Adding content to my website was definitely the most entertaining part for me because I was able to discuss information that I am very familiar with. I used the opportunity to share my experience in video editing and visual representation to teach others. When first approaching my website I was fairly confused on how to begin customizing my theme.
This confusion required me to do additional research on configuring my WordPress website. For example, Kinsta is a blogging website that created a helpful post on how to customize your WordPress themes. kinsta.com/blog/how-to-customize-wordpress-theme.

Using this information I was able to navigate through the WordPress administrative settings and begin customizing my website. When learning new interface it is very common to run into confusion and frustration. This is why research is important when learning any type of interface from website creation, to video editing, to audio design, and more.

After modeling my website to my desire I began by deleting all the default information added. I gave my website the header, “Visual Creations” with a sub-header ‘online space for sharing visual creation’. This helps me focus on the goal I have in mind for building my website.

For a few days I was confused on how to customize the “Home” page section because there was no information. This is when I required the assistance from another website. The following website https://www.wpbeginner.com/wp-tutorials/how-to-edit-a-wordpress-homepage-easily-effectively. This website was helpful because I was able to navigate back to the administrative settings above and create a new “PAGE” for my home screen. This was confusing for me because editing the home section of my website required leaving the website page view. This information allowed me to jump into adding the content my website needed.
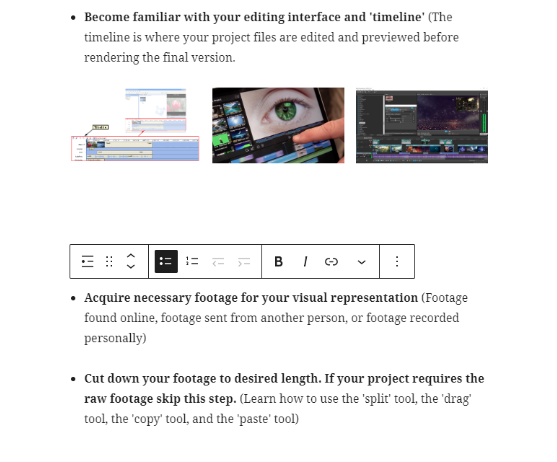

Throughout building my website I ran into many more confusions while learning how to format, space, add media. Creating a new “Block” allows you to use the side panel for adding bullet point lists, adding pictures, adding video, adding files, new headers and tables.
This allowed me to format my website how I wanted and space things appropriately.

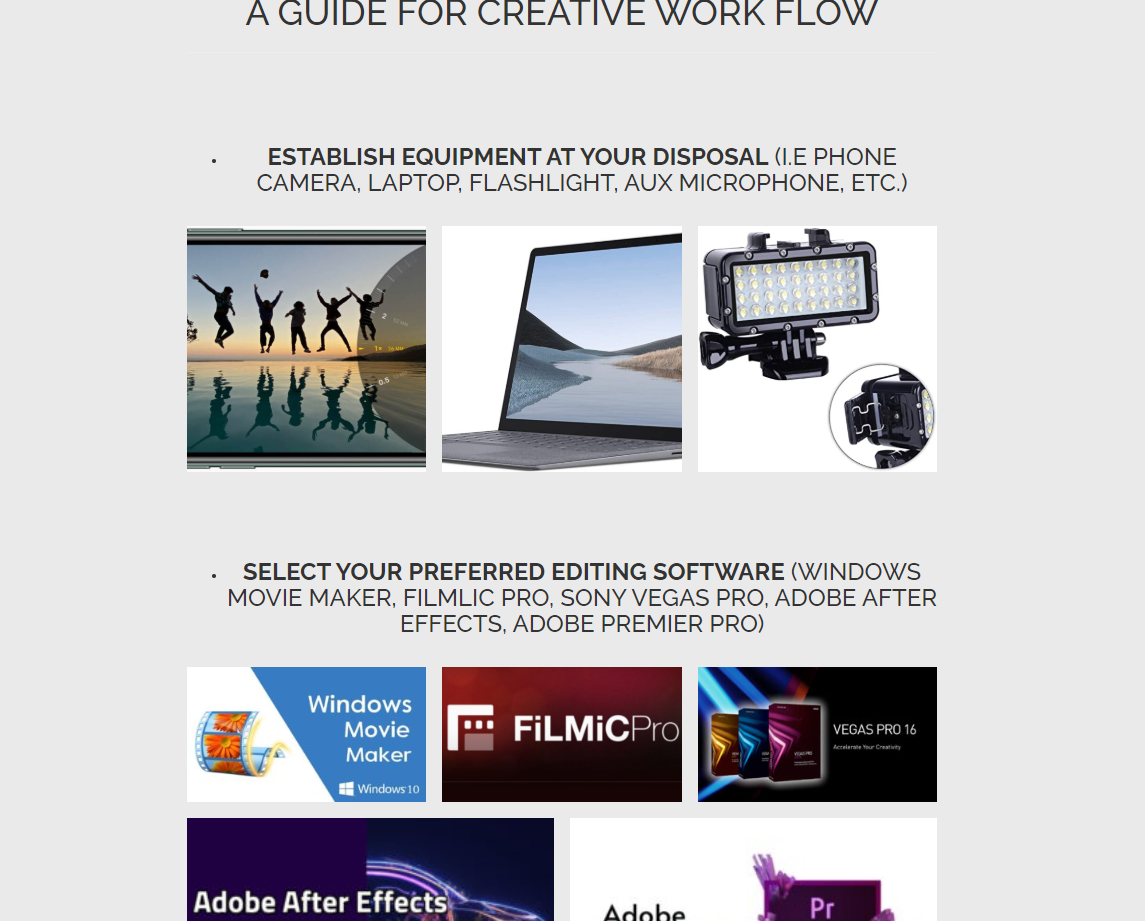
Adding media to my project required me to use the internet to find relevant images to represent my ideas and illustrate what I was discussing. I used google images to find the majority of my pictures. I used these pictures to display what equipment is required for creating visual representations using footage, and how to navigate editing software interfaces.
Different aspects of developing my website required work away from the website editor. For example, creating visual representation as an example for aspiring creators, learning how to use multiple editing software, and understanding audio design are all important factors in creating significant creative visual work.

This opportunity to build my own website has changed my perspective on website creation and added a new skill to my arsenal in online marketing. I think I have come away from this assignment more knowledgeable on the digital world as a whole. The majority of our online activity exists in online browsers where we interact with websites at all times. I am glad this assignment has tied into many of my other passions because it allows me to discuss information I am familiar with while learning new skills at the same time.
Building a website is a work in progress so I do not consider my work finished. I am allowed to own this domain for a year so I will be changing it in many ways during my ownership.

This entry is licensed under a Creative Commons Attribution-NonCommercial-ShareAlike 4.0 International license.