Week #4 – MEME ME

Are Internet Memes ART? 

Let’s discuss! You know that you want to!

**The class video recording and tutorial for this assignment is posted below:

https://us02web.zoom.us/rec/share/ZuwpEQcb7mOXgKpxjnIaVcmDb_-JnHBILq9dp9SEonqV-Oavfo6pqvPLlXtT3qo9.qBZyRXHg9odVoid-

Passcode: ^7h3Z!QC

First – lets screen the video above together and then later read the hyperlinked articles below for more context.

Second – The Assignment #3 Details: A New Blog Post is in order.

Assignment #3 – Are MEME’s ART?

Start by doing an Internet search for; “Are memes ART?”

See what you discover, gather those website links and be prepared to share them in your new post. (at least 2-3 should be fairly easy to find)

No matter how you cut it, memes are here to stay… but is this good or bad for Art? Is this good or bad for communication? Are memes simply just forms of self-expression? Or are they MORE? Well, why or why not? I want to know what you think.

Can MEMEs be used for storytelling? If so, How? Explain how they are used in your experience here on the Web.

Let’s create a compelling way to share our responses! Remember to pay attention to the good blogging skills list example in last week’s post?

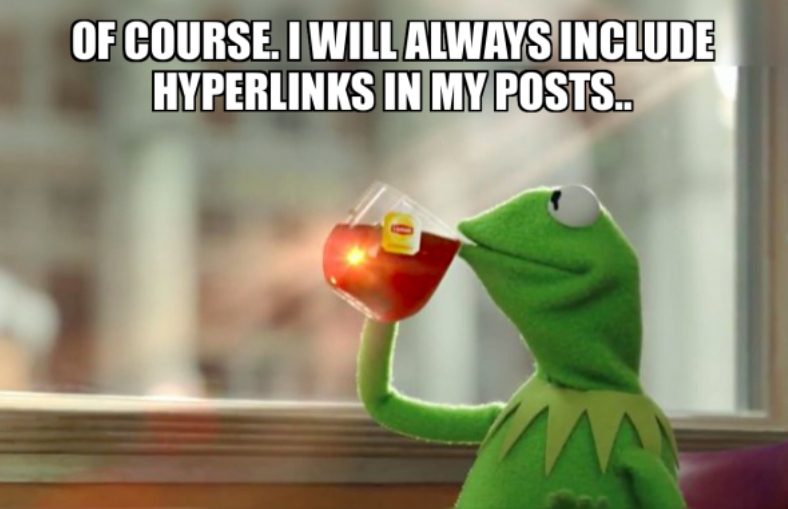
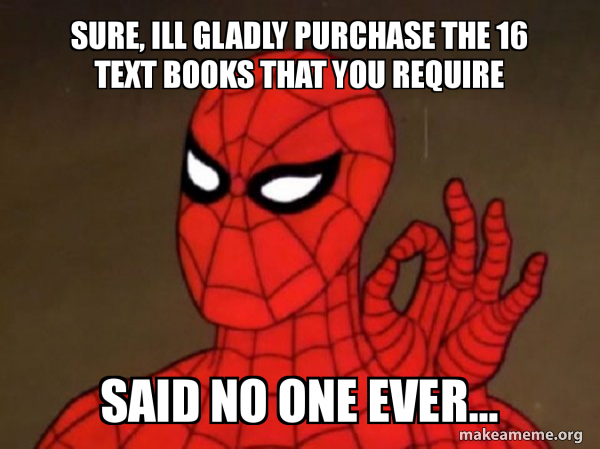
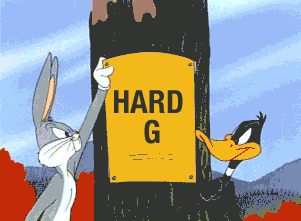
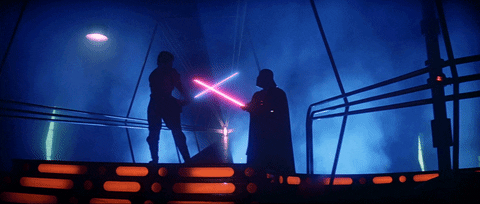
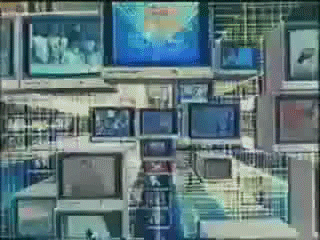
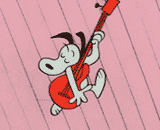
And by all means plan to create, search for, discover and share your favorite existing Memes via an image or URL, or embed them into your new blog post for this coming week. You must share at least 3 of your favorite all time MEMEs in this post.

How will you craft a narrative between using Memes and your own personal experiences?

**Oh, and, you MUST create at least 2-4 of your own memes to express your sentiments for our CT101 class! Be sure to include the words: “CT101” in your meme!

Perhaps, you will say “CT101 be like…”

OR, “What if I told you that CT101….”

All of this nestles quite well into in new Blog post! (thats your assignment!) Please consider the formatting of this blog post that you are reading right now. Notice how we see a mixture of images, video and hyperlinks that help give context and reference to where we are drawing resources from.

Some Online Tools for making Memes:

Giphy.com – (create a free account)

Imgur.com – (create a free account)

Make a Meme – work with some of the Internet’s classic templates

Are there others that you know of? Please share them in your post!

More Insight on MEMEs: 

Read the articles below and be sure to reference them for context in your post!

Thrillist top 100 memes of all time

The Wiki Definition(s)

A good synopsis via how-to-geek.com

Another Take via theVerge.com

Are Memes the Pop Culture Art of our Era? Kate Knibbs

(I know, I know, its a dream come true assignment!)

Have fun!

Assignment #2 – Making our first GIF Post Narratives!

Making our first GIF & GIF Post Narratives!

Assignment #2 – (week #3)

***the full video tutorial will posted after class at the bottom of this post***

Exciting Times!

Let’s make some GIFS and explore their history, contexts and the potentials of this Internet culture sensation! GIFs are obviously here to stay! How far will they go? Can you tell a story with GIFs?

Some of you have already applied some great GIFS to your posts from last week!

But First, and Importantly:

What makes a successful, compelling and engaging Blog Post?

You can certainly see my examples, but now, you have a contrast and a result to work from now that we have published our first assignment (did you publish assignment #1?), looking back, did you cover all of these aspects listed below? (you can always edit and update your existing posts, I highly encourage it! And make sure that you are responding to your comments!)

Good Blogging is:

  • being thoughtful with your post titles –  How will your audience know what the post is about if you don’t make this clear and engaging?
  • giving your opinions, feelings, insights & philosophies – Ct101 is a platform for you to share, express and discover the potentials of creative writing through embedded media and well crafted narratives.
  • backing up your resources, inspiration and research with hyperlinks, we need to see where the source information has come from.
  • proof reading your grammar and punctuation. It’s OK to work stylistically, but it should be kept consistent.
  • and always embedding cool media that’s made or found from elsewhere to give context and keep the audience engaged.
  • what else could we add to this list?

(You can click on the images above and they will re-direct you to their websites. I did this by selecting the “custom URL” option in the media / image uploading specifications area in the blogging editor and added the URL – watch my demo)

Imgur and Giphy are great platforms to explore and create GIFS with!

They both have a HUGE repository to choose from! In our class this week let’s check out both of these platforms in a series of video tutorials, both Imgur & Giphy are free to use and work with. (I encourage you to sign up for your own account, both are free) Let’s experiment with both platforms this week as we work on this week’s new assignment blog post.

Be sure to share your thoughts on what you think about both platforms, did one work better for you? If so, what were those features?

*The Assignment #2 Details:

Let’s publish a NEW BLOG POST of your own and be sure to comment on one or two of your Classmate’s GIF Posts too!

Video tutorial from today’s class on 9/13 – 

https://us02web.zoom.us/rec/share/wkNQuBZd1SlZnAJKX2fXnHpKjRhfUDWrcvb7Ay3KY7VbbjqpdR02DPyxIvjJl7Fh.naDxMPOMs4HZDUQH

Passcode: 47.JuH8P

Create a NEW blog post on our class website and embed a series of new Reaction GIF s that narrates your feelings about our CT101 class so far!

Let’s get creative, how can you tell your story in GIFs so far? Hmm?

Think about these questions, and answer them:

What did you think on the first day of the CT101?

Did you like hearing about the course and its creative content? How did it make you feel?

How does CT101 compare to some of your other classes so far?

What are the creative potentials of this class?

How do you feel about learning new skills that use Internet tools?

(yes, you can make this post as long you wish and make it flow like a story – This assignment description that you are reading is also a BLOG post example of the assignment!)

***Each reaction GIF that you use should be accompanied by a sentence or two or three of verbiage to help describe the GIF and narrative you are communicating.

Here is an example of me responding in GIF expressing the above GIF:

“Demonstrations and examples will be shared and executed during our class time, don’t miss it!” (and if you do miss it, I’ll post the video tutorial from class here below) Sinister audio fades in and out as Skeletor mercilessly GIFs himself into oblivion!

**PS – Here is a handy tutorial on how to make a GIF from a YouTube URL using Imgur from Prof. Smith a few years back –  My first GIF post

How do you say it / pronounce it? Gi-f or Ji-f?

The battle continues! 

Oh, wait, you cant possible publish your new post without referencing and discovering some GIF history! How will you incorporate it into your new post?

Here is the WIKI for the GIF file format – its a good read.

Smithsonian – History of the GIF

A good article for WIRED on the 30th Birthday of the GIF

GIF History via – VOX

Let’s get started!

Here is the class video tutorial below:

(to be posted after class on 9/13)

**And be sure to also comment on one of your Classmate’s GIF Posts!

Let’s Do it!

Internet Happy – Assignment #1 – Forward we GO!

Week #2 – A Recap & Forward Motion!

The Course Schedule page is here (this is our most important page as it hosts all of our weekly assignments and their specifications – please check this page each week at the beginning of class.)

1. Did you Read the welcome blog post here <–it has an assignment that prepares us for this week – the assignment details are located at the bottom of the post, it asks you to leave a comment, and to respond to one of your classmate’s comments, did you? 

2. Let’s get signed up! Did you sign up for the CUNY commons and the CT101 website? If not, please review the process for access to the CUNY commons and the CT101 website here  Read this blog post for details < —

And now… this week, its time to get blogging!

**Here is the class tutorial about assignment #1 from class on 9/6 – https://us02web.zoom.us/rec/share/0Tk-aLFLX2Ousa5Fr5Sk3tbEgJrLzaYkbYE3BpGwJvxLvVIM6TMEt7QvCmX36M53.fh33RUN8vLmO7_XFPasscode: 0cTQWah$

Let’s learn about and tour our WordPress blogging interface. We will discuss and learn how to sign in, add text, verbiage, images, GIFs, videos, hyperlinks and contextual content into the blogging interface! We will begin by sharing some sentiments accompanied by visual media to help tell our stories.

***Each week I will screen record a video tutorial that demonstrates techniques and tips for each assignment – The tutorials will always be posted shortly after class directly into the blog post with the assignment details.

This Week’s Assignment…

Assignment #1 – What Makes You Happy on the Internet?

Your goal for this week will be to read and follow the info / links listed in this week’s blog post. Absorb the information and then begin to prepare and gather all of needed media, images, links and content that you need to create and publish your first blog post here on our class website!

(This assignment was originally created by Professor Michael B. Smith a few years ago, it still holds true as a great example and ice-breaker for our first blogging assignment.)

In a new blog post, take the time to introduce anything you want about yourself and describe a piece, or multiple pieces of the internet that is “making you happy” this week. Share what the content is about, the media format, and the online space in which it was discovered. Let us know why this (or these things) make you happy! Make sure it’s something you can ’embed’ into your post and be sure to link back to the original source of the the item (hyperlink).

(I shared my example, its at the bottom of this post in the form of a hyperlink)

Below is also an example:

“I discovered recently a writer who made side-by-side comparisons of frames from the Simpsons with frames from the original movies that inspired the cartoon. I love this kind work because it shows how culture is seemingly endlessly recycled and remixed.”

Also, here’s a video short (below) from the original, famous “shower scene” from the 1960 film Psycho that the inspiration is drawn from.

For another example of “how” your assignment #1 post can potentially look, check out professor Seslow’s example:

Assignment #1 Example Fun with Ryan

PS – THIS whole blog post is an example of a good quality post! Notice the length, the amount of embedded media added, hyperlinks, content and context to help support the verbiage.

It all just takes a little bit of regular practice.

Let’s do it!


Getting Signed Up and Signed Into the CT101 Website!

an old TV from the 1980s hosts the Digital Storytelling course title program


Getting Signed Up and Signed in to the CT101 Website & the CUNY Academic Commons.

Welcome Digital Storytellers!

Please follow along with me during our class session to get signed up for both the CUNY Academic Commons and for this website, follow me and scroll down..

As we know, a big part of CT101 is the class the website. It is where you will begin your active role as an “Author” of our CT101 community and where you will be publishing all of your class work and assignments. You will also become a part of the CUNY Academic Commons Community (Im a big fan!)

**First things first,

It is super important for you to have access to your York College E-mail Address, and to make sure it works!  You will need to have access to it in order to sign up for our CT101 web site and the CUNY academic commons.

***If you need assistance with setting this up do not hesitate to contact the York College help desk at 718-262-5300 as needed or at [email protected]

Lets Get Started!

We must follow the sign up steps in the order below (I will demonstrate the process in our Zoom class on 8/30)

*Remember, you must use your CUNY e-mail address for this only!

1. We will Sign Up for the CUNY Academic Commons Here – simply click the  “Register” button and fill in the form and complete the sign up! You will receive an e-mail that verifies your account. 

2. After you sign up for the CUNY Academic Commons, please Sign-Up for the CT101 website and use the SAME Username and e-mail address that used to sign up for the CUNY Academic Commons – this info will allow for me to send you a direct invite request from our class website to become an Author of the website. Please “accept” the invite when it arrives via e-mail. You can also accept the invite under your commons profile under “my invites” (I’ll share an example)

.. And then…. You will have access to “log in” and start blogging as a CT101 author. We wont start that part until next week though.. The log-in prompt is always located in the main navigation menu area of the website – depending on the device that you are viewing the site in, you will see it in upper right hand corner of the page via desktop or laptops, but mobile devices may see the log in prompt on the left side of the page, either way, click “Log In” and enter your Log In credentials. 

**You cant start publishing content as an author of the website on CT101 until you have completed the sign up process steps above. Please let me know if you have any issues.

More to come!

Welcome to CT101 – Digital Storytelling! Fall 2022

Welcome Everyone!

Here we are: CT101 – Digital Storytelling!

The Fall Semester of 2022!

Ok, this blog post is a lot things, but first and foremost it’s a welcoming! Im excited to meet everyone and share our 1st class session to connect and learn about each other. Below, that’s Nyle DiMarco, he’s a Deaf Actor and Artist, he is showing us how to say: “Nice to Meet You” in American Sign Language. I’m also Deaf and Hard of Hearing, so you can expect to learn some ASL and see more ASL GIFs this semester! I hope that you like animated GIFS, we are going use a lot of them here, and make them too!

We are going to spend a lot of time discussing ways that we communicate.

an animated GIF of Nyle DiMarco signing "Nice to Meet You" in American Sign Language

There is a lot of compelling content to cover this semester in CT101, which will happen in many fun ways!

**This is the direct URL / Link to our class Website – https://ct101.commons.gc.cuny.edu/ <—that link is where EVERYTHING is happening for CT101.

I’m not a fan of blackboard (who is?? Its outdated and clunky..) and I will only use it to remind the class about password sensitive things or send a class e-mail.

Please make sure you are familiar with the CUNY academic calendar for the semester as we will follow that..

kermit the frog rigorously typing - animated GIF

The CT101 Class Modality / Structure – CT101 will be taught synchronously in person this semester on campus here in the lab on the 4th floor in room 4m03 (academic core building) – we will also have course work that will be assigned and completed outside of class.

Please know, I am always here to help you be the best that you can be in our course. And we are all here to do the same for each other. Our class is a community! A big part of our class is exploring your creativity and being experimental with the Internet! Plus, we will learn about the evolving array of digital tools that are available to us. We do quite a bit of the creative work from our own personal work spaces as we integrate the class work into our lives.

Please know, I will always screen-record each and every assignment’s description, how-to’s and tutorials and share those videos here on our website. Please think of this website as a repository of information, energy and inspiration for the course (and beyond!)

*The Class Website – Our class website takes place on the CUNY Academic Commons! You will soon discover that the Commons is a huge resource and regular source of inspiration and community! Im excited to share this with you all.

**This Week’s Assignment is Below**

Lets leave our first Comment!

In the comments section below (if you scroll down to the bottom of this page) Add a comment, Your comment will serve as your attendance today, but please introduce yourself! Tell us a bit about yourself, What is your name? What you are studying here at York College?  What is your favorite movie, activities, ice cream flavor? Favorite place or apps to visit on the web? What are you most interested in at this moment? Etc..) Feel free to add some links! Lets get to know each other. Also – Reply to someone’s comment, say hello and share some interests. Commenting and activity on the website is big part of our class!

**PS -I moderate all the comments to make sure that spam bots don’t spam us into oblivion! If may take a few minutes before your comment shows up, no need to submit it twice if you don’t see it appear right away ** Also, please explore this website, read through the syllabus and some of the course resources, it will be super helpful in the next coming weeks.


CT101 Final Blog Post & Course Completion Information

CT101 Final Blog Post & Course Completion Information

Here we are in the final weeks of our Spring 2022 semester!

It is my intention to get things set up in advance to help and give everyone enough time to complete assignments, catch up and feel confident about our course completion. Most of us will be focusing simultaneously on finishing our website building project, as well as populating the website with blog posts and content, while others may be retroactively catching up on or revising blogging assignments and commenting. 

Video Tutorial on the Final Post Process:

https://us02web.zoom.us/rec/share/Yyb5DVyYtKbWXQA6SD9wRYVuaoSxiMbhe-TOr9htwxdbvAJp1Q9SXJVfUavFwLkK.AVn-L98PLjrJ8GwePasscode: *8qs@Q6@

**Please read all of the information below carefully & mark your calendars**

Please e-mail me with any questions at – [email protected]

Please know, I am always here to help in anyway that I can. Please don’t hesitate to reach out to me. Please know, it is not too late to catch up if you are a bit or even far behind. We can work together but I need communication in order to help.

The last day of regular classes is Tuesday May 17th, I would like to use that class session to host a Zoom session from 10AM -12PM (this will not be a mandatory class) I would like to invite both sections of the course and for this to serve as a platform for those who have specific questions, need extra help with troubleshooting their websites and or helping with clarifying anything to help us complete the semester. (the zoom link info is the same as always) All of our class sessions and assignments have video tutorials that are recorded and added to the weekly blog post assignments on our class calendar page here.

**Please read all of the information below carefully & mark your calendars**

**Final Blog Post Submission Guidelines**

Please make sure you follow each step below – it is really important to illustrate each retained skill and ability to follow the guidelines.

*Each student will write and publish a Final Course Reflection Blog Post.

You will publish the Final post to the CT101 website. You will e-mail the direct link of your final blog post to me – [email protected]no later than Tuesday May 24th by 6 pm. 

***Please do not publish or e-mail the final blog post link to me before Wednesday  May 18th. This post and submission process is to be done during final exams week and serves as our final exam.***

*The e-mail subject of your final blog post will say: “CT101 Final Blog Post/Your First & Last Name”

I will confirm the e-mail by reply once I receive it.

Here is an example below for finding a blog post’s direct URL – (this is the direct link to the text you see at the moment in the web browser address bar at the top of the browser) The post must be published in order to copy it and paste it into your e-mail to me – it would look something like this below.

*Your final blog post is Mandatory, it serves as our final exam and final project and it must include ALL of the information stated below:

Your final blog post will be a detailed narrative and re-cap of what you have learned in CT101, and a reflection and assessment of what grade you have earned in our class and why you deserve that grade? (Yes, you must include this part, it is mandatory) 

What did you enjoy about our class and how you will apply your new skills into the world?

Will you maintain and keep up your new website? If so, how? If not, Why not?

Your final blog post should include a culmination of supporting images, GIFs, videos and hyperlinks to all of your existing published blog posts.

(pro-tip – you have already had practice with the mid-semester assessment post, think about this as “part 2 ” to that post)

Please let this post display the best of your skills sets learned and applied! 

**This post should be your longest and absolute BEST work.**

*Final Website Link & Description –  As a part of the final blog post each student will be sharing their new website URL (your domain name) it must be hyperlinked and you will give a clear descriptive tour of their website and share how the website is being used, plus share thoughts on your website building successes, frustrations and an over-all assessment of building and having a website. You must include a screen shot of each page on your website to support your website tour. Your website must be free of ALL default content and must have at least 4-6 pages, 1-2 new categories and should display a clear visual customization from the default template.


**It is Not Mandatory, but if you would like the opportunity to visually present your final blog post & website to me in person during final exams week – please meet me on Thursday May 19th or Tuesday May 24th @ 10am – 12pm –  in room 4M03 (same as previous in person classes) I will be there on those days and happy to meet with you!

*The Final Blog Post submission requirements as stated above are Mandatory, please let me know if you have any questions.

All questions should be sent to – [email protected]

Im here to help!

Week #13 – Share your Website’s URL & Some Social Media Fun

Week #13 – Share your Website’s URL & Some Social Media Fun

**Assignment #12 details are below!

Video recording / tutorial from class on Tuesday 5/3/22

https://us02web.zoom.us/rec/share/dA-tq-65us-2RPNX7JGEK4EMJgbhpF7SHbB2QuUzMFiQXTT34Nx4XbIlYJY-Irnk.yq_LIB4YZF2XP2HD

Passcode: 2F3r%vEF

Video recording / tutorial from class on Thursday 5/5/22

https://us02web.zoom.us/rec/share/X1DTIg7u5Yk84U1MWfePeNg5uraInSHCLFcElqNrBpb8Uf7EeC-OW3qEDsci7vec.3hscr1CCb-ypWmZHPasscode: *c4q8t=E


Snoopy loves websites, and apparently… tweets.. & toks .. This week in CT101 we will share and explore each others websites, learn about creating and adding social media content into our blog posts, website pages and more! (This might be your own social media content / work or content / work taken from your favorite feeds / brands / people) to help expand your narratives. We will also chat about “custom links” and how to add them to your websites navigation menu structure. Of course I will record this process during Zoom and post the video tutorials here below afterwards.

Here we are 3.5 weeks into being the proud owners of a personal new Website! We are customizing our pages, building menu navigation, tweaking colors and fonts, and blogging away into oblivion! It is exciting, and discovering new ways to create and share content are a big part of this process.

**Assignment #12  Details  – (2 parts)

First Part: Its time to share your website’s URL, please add it to the comments section below in this blog post (My URL is already there as an example, your URL should look similar with your own domain name)

Simply leave a comment below sharing your website’s address and press the “Post Comment” button!

Be sure to include the –  http://  part.

Here is an example–>  http://your-website-url.com 

This is my example of my website URL – https://ryanseslow.com

Second Part: Explore some of the website’s of your fellow classmates! Leave them a comment, or two about their progress directly on their website! Then, write a blog post here on CT101 OR on your own new website sharing your thoughts and feedback about discovering your classmate’s websites. Be sure to include their URL in your post (and hyperlink it!) What do you like about the websites that you discovered? Did you find a favorite blog post, or project? Share it! Give some feedback!

And, Why are we doing this?

Well, to share our development, show support for each other and our collective process of course! Maybe your classmates and peers missed your last few posts and are in need of some feedback, inspiration and contrast. Let’s dig in!

Have Fun!


Panoramic Storytelling & Multiplicity

(click the images above to enlarge)

Week #12 –> Welcome Back! (another FUN in person week!)

Assignment #11 – details are below!

A few semesters ago in our Digital Storytelling class we played with the idea of non traditional image-making and multiplying ourselves into a single image frame. (No photo editing software required, but it helps later on) By using the “panoramic” feature of our smart phone cameras we created two examples above to show the potentials of the project by using our immediate surrounding in this case, the hallway outside our classroom and the class. 🙂

The top image is a traditional class portrait. It’s a long stretched frame that bends itself in an overly extended way. The light source is coming from behind the photographer giving off a great amount of natural bright light. The bottom image is the opposite and we see how the bright light from the windows serves as back-lighting when the photographer is behind the light source shooting the image directly at it. The light places an emphasis on the absence of that light and creates a shadow effect of the students in their composition. We talked about how lighting can add this effect and extend a narrative.

Let’s try again with our class this week in person!

But how can we push the idea further? Should we collaborate as a single group or work in 2 or 3 smaller groups? Will other objects be added to the potentials of the project? How can we create a “story” through this idea?

But wait, “how” are these images (above) created?

  1. Open your smart phones camera and set it to “panoramic” mode.
  2. Arrange the subject(s) in one area to the left side of the photographer. Give a good amount of distance between the photographer and the subject(s). The subject(s) need to hold still as the photographer begins to move the camera past them until they are out of the view finders frame.
  3. Once the subjects are out of the viewfinders frame the photographer stops the motion of the camera and holds it in place. The subjects then move behind and around the back of the photographer and slowly gather themselves back into a new pose or position on the right side of the photographer.
  4. The photographer continues to move the camera past the subjects until they fit into the composition.

What will you do with this new technique?

How will you use it to “tell a story” in one frame using the same subjects/objects? What kind of situation or narrative can or will you you create?

Let’s share our results in class!

**Assignment #11 Details: Create a new blog post here on CT101 that tells a multiplicity story in one panoramic image frame, as you now know, the potentials are endless! Yes, you can take more than 1 picture and I highly encourage it as you will need to practice and have contrasts, perhaps you take a whole series of images? Either way, your image(s) should tell a story, share a situation or aftermath of “something” –  Perhaps your story is fictional? Perhaps your story is also written in a “How-To” tutorial format about your process? 

PS – panoramic images can be pretty big in terms of file size! Its likely best to resize the images and make them smaller before uploading them here to CT101 – I suggest resizing the images with one of these free tools -(yes, plenty to explore!)  https://fixthephoto.com/best-free-photo-resizing-software.html

What will you do? Have Fun!

Exploring the WordPress Potentials, Part II!

Exploring the WordPress Potentials, Part II!

Assignment #10 (details are below)

Welcome Back!

***Quick note, next week is spring break and the week after that we meet in person again, please mark your calendars as it is very important that you are in attendance on in person class sessions.***

(recorded videos from our class session below at the very bottom of this page – scroll down)

Let’s get a bit more specific with WordPress and begin to apply intentional context to our website design. Last week we started setting up our new websites by simply discussing the potentials of the visual design creation and experimentation process.

The recap – we talked about how to set up new pages, and how to add those pages to the main navigation menu. We discussed the navigation menus locations and what their functions were. We looked at the footer space and adding widgets in the footer areas. We also took a peek into “plug-ins” and installing plug-ins (especially the Classic Editor for the similar blogging experience we see on the ct101 site for writing our posts) and the differences between pages, posts & categories.

This is quite a bit of information and I highly suggest that you re-watch the class video tutorials from last week for the practice of retaining the new skills that were shared and displayed. I do this very often myself as I find it super helpful for being able to replicate a new skill or technique.

This all takes regular practice and a bit of openness to experimentation in general. How did you do with your experimenting last week? What did you work on? You can leave a comment below on this post and share the link to your new site :))) – WordPress is a very intuitive piece of software, and it wants your creativity! Lets continue forward. I will be sharing a new series of demonstrations and will add the recorded videos from our class session below at the very bottom of this page.

Assignment #10 – Details – Lets begin populating our new websites by publishing a new blog post there this week. Thats right, You will be publishing a new post there and also “cross-posting” that information here on CT101 as well. There is an efficient way to cross-post content across wordpress websites. I will show you how.

Lets say you just published a great new blog post on your new website and you also want to share it with your classmates / community here on the CT101 website. (You can! Its easy)

Step 1 – is to publish the new blog post on your website. Remember, every blog post has its own unique URL that can be later shared on other places and space on the Internet.

An example of cross sharing your post on may be done in a new post on CT101 that reads:

————

Your Blog Post Title (all blog posts need a great title!) 

(insert an image – GIF – Meme – Quote – or some kind of related media)

“Dear Fellow Readers – I just published a new blog post here on my website: http://yourwebsitename.com, (make sure to hyperlink the post url) please come and check it out and feel free to engage in some fun dialog. Thanks so much”

————

This is a very minimal example above but perhaps just a title and a link is not that interesting? We need a bit of compelling energy to draw the reader from CT101 over to your site. So make this interesting and creative!

**This Week’s Blogging Assignment Prompt for Assignment 10**

Publish a NEW blog Post on YOUR new website, the post can be about anything that you wish that has direct context to your new website’s stated intentions (what your site is being used to promote and share.) After publishing the post, create a new blog post here on CT101 that shares a synopsis of your new post from your website that will entice and grab our attention, be sure to include the direct URL as a hyperlink to the new blog post.

PS – WordPress is really vast and there are many many tutorials out there for “WordPress beginners” – Perhaps YouTube is a helpful source for finding some new resources outside of class? Of Course! Here is one, but feel free to share links to others that you have explored (add the link to the comments section below.)


The Video Tutorials for this weeks’ assignment are posted below (from 4/11/22 & 4/14/22)

https://us02web.zoom.us/rec/share/98tlj5CPJG2085qdTSmveWK6UWecLlNNxYIowixzouQAy5ISQAdLKZ2YXSp7FQM1.fJFc5N9cvUGFdIi5 

Passcode: N1oz9^=P

https://us02web.zoom.us/rec/share/xmQnlxz1YnWoLuWdvpIpop7N6u3TcK6uQhlc9DTPya-kzROCwcqeXgQ9aTjOvv8I.aztZY2gTMl3AZAaQ 

Passcode: =6nM&tm8

The WordPress Customizing Series, Part 1

The WordPress Customizing Series, Part 1!

***Below, Is the class recording from 4/5 – you can follow along and start customizing your new site!***

https://us02web.zoom.us/rec/share/kUiR2lSqN8frppas36jFo9sArqiGmutotmKr_Es30wh5sc4u7Eia8LqQg8ogVf04.tFTPQ6eIK1qjFhjU

Passcode: N7cH*Mgc

***Below, Is the class recording from 4/7 – you can follow along and start customizing your new site!***

https://us02web.zoom.us/rec/share/4jI1bo-n6rh–JGSV4U4RHdh-lhbsexesS56D5nZZa3shrqVj4vglwkze5bFd_lo.Xddtz-YknvAYsKe7

Passcode: !xKR=hi9

Assignment #9 – > (blogging details below)

This week in CT101 we will be focusing on getting everyone set-up with their new websites! The coupon code that you need was sent last week to your York college e-mail address (e-mail me if you did not receive it).

By now, many of you got started, you have a new domain name, a web hosting account, and a website framework ready to be built and customized! Ill be helping here with the customizing process of WordPress. This part will have multiple aspects to it. There is a lot to share, create and test. The process is fun and will take a few weeks as you make several visual and functionality decisions about how you would like your website to look. This will all play out in context to “how” you plan to use your new website.

So, how will you be using your new website?

Assignment #9 – This week lets dig into some of the customizing features that WordPress offers as we begin to design our new websites. What did you work on? Did you create a series of new pages? Did you remove default content from your theme? Did you create a category or two? Lets publish a NEW blog post that shares a narrative statement about your process and discoveries, as well as HOW you will be using your new website as we go forward. You can publish this post on the CT101 class site. Please dont forget to embed various pieces of media (images, screenshots, gifs, hyperlinks) and also share contextual content to help expand your post. 

**For example, there are many video tutorials on YouTube that share “how-to” videos for beginners, or customizing videos for the theme that you may be using, this is context 🙂

As your prof, I will continue to make and record class videos and also share some helpful curated content from the Internet. We will be discussing HOW we will all be using our websites individually, just to mention again 🙂

But WAIT! You cant do anything above unless you have done this: -> Domain Name Registration, Hosting Set Up & WordPress Installation! <— Please read this important post to get started! (from last week)

Im going to focus on using one of the popular WordPress themes called:  “Twenty Twenty-Twenty-One” ( or Twenty Twenty) – these themes are extremely versatile and are great for wordpress newbies and beginners. I highly suggest that you consider using one of these themes. All themes are different, and many of them out there promoted on the Internet are not free (plus, its always helpful to start with a theme that has a good amount of video documentation that already exists.)

More to come!


PLEASE E-MAIL me and say hello, let me know how I can help you! [email protected]

Domain Name Registration, Hosting Set Up & WordPress Installation!

Domain Name Registration, Hosting Set Up & WordPress Installation!

Assignment #8 – Part 1  (part 2 is at the bottom of this post)

**Please read through this post carefully and watch the video tutorial below as it contains a lot of important information – follow the tutorial for the section that you are registered in**

Thursday Section Tutorial from 3/31

https://us02web.zoom.us/rec/share/q951XmMd7qQc5HwgRXpAxiudAm5sxdpJ0gXx33Z0s_ZNmXjQNCWat1cxKpwWpH1x.iFZsSWH8LVt6uCoS

Passcode: cXp2GH0+


Tuesday Section Tutorial from 3/29

https://us02web.zoom.us/rec/share/LRfMSgjfGz4Eda7g4uyu5ne2l2HXStgCZ6iNiXys1LLljcoW6Wnacf3v0oLuGGJM.pUznliszaSIF5GDM

Video Passcode: ?w5xkA&a


“The Journey Begins!”

*Individual student Coupon Codes for the domain name & web hosting set up will be e-mailed to you from blackboard – be sure to check your York college e-mail to get the code. The code can only be used 1 time.


Last week we began talking about Domain Names and what role they play in creating a digital identity on the web (and as a part of this class.) If you missed that post, please be sure to check out our course schedule page under week #8 as it has context and will help make this next step a bit smoother. 

This week we are going to get started! We are going to begin the process of registering a domain name and also setting up web hosting, which will allow you to put files up online that will be discoverable through your new domain name! We are going to use a form of ‘shared hosting’ where you get a portion of a server – think of it as having an apartment in a building. With this shared hosting you will be able to do a lot of things including installing your own instance of WordPress (**remember, this is NOT wordpress.com but the open source version of wordpress.org) so you can start building your website for your domain name.

We use a company called Reclaim Hosting, with which we have a contract with so you will enter a coupon code and start your account for free.

*The coupon code will be e-emailed to everyone via blackboard on the morning that your class meets during week #9

We chose this hosting company because they have a lot of experience working with students just like you, that are likely getting their first domain name and web hosting account. You will be creating an account just like you would with any online vendor with which you want to purchase something. So it’s not a ‘CUNY’ account, we’re just giving you the coupon code to pay for the year’s service. The service will last for 1 year.

You do not need to pay for anything, so please reach out if you have questions – [email protected]

With that said, you will need to provide a name, address, and phone number. Lets go to this sign-up page <— to get started with the domain name selection process.

1. First you will need to pick your domain name, make sure that it is available and make your selection to proceed. (I suggest sticking with the .com or .net extensions)

pick-a-domain-name

2. On the next page, check the ‘add ID protection.’

no-privacy

3. On the next page you should see two items in your cart and a price of $45 with ID protection, you will then enter the needed information for your account and provided coupon code and validate it. (you will NOT be charged for this, its already included in the course.)


validate-code

4. Your total should now be $0. If it is not then check the items and your cart and adjust.

5. You should now fill in your personal information, and select the payment by mail option. (again, you will not be charged anything.)

6. Complete the order and check your email for your account information and a verification of your e-mail, e-mail. With your new account information, log-on to Reclaiming Hosting. Shortly after setting up your account and registering your domain you must verify your account via        e-mail by clicking on the link they send to you. (be on the look out for a series of e-mails from Reclaim Hosting.

7. YOU ARE NOW ALL SET AND READY TO START WORKING WITH YOUR NEW DOMAIN NAME AND WEB HOSTING ACCOUNT!

8. Its now TIME TO INSTALL WORDPRESS. – You will soon refer to the video below (coming after class on 3/29) and follow the step by step guide to install wordpress correctly. 

Coupon codes for the set up will be e-mail from blackboard – be sure to check your York e-mail to get the code.

**********************************

Assignment #8 – part 2 – (you must complete part 1 before moving on to part 2 – After following along in our zoom session today and then reregistering your domain name, setting up web hosting & wordpress – please publish a detailed blog post about the overall experience of registering your own domain, and setting up your web hosting account. Be sure to include screenshots, images, videos and hyperlinks for context. (as always)

Tutorials: (same as above)

Thursday Section Tutorial from 3/31

https://us02web.zoom.us/rec/share/q951XmMd7qQc5HwgRXpAxiudAm5sxdpJ0gXx33Z0s_ZNmXjQNCWat1cxKpwWpH1x.iFZsSWH8LVt6uCoS

Passcode: cXp2GH0+


Tuesday Section Tutorial from 3/29

https://us02web.zoom.us/rec/share/LRfMSgjfGz4Eda7g4uyu5ne2l2HXStgCZ6iNiXys1LLljcoW6Wnacf3v0oLuGGJM.pUznliszaSIF5GDM

Video Passcode: ?w5xkA&a